Thibobo
Member
Hello Guys, in this guide i will be covering how to install custom firmware on your compatible ps3 system in 2023, this is a noob friendly guide and my guide is to make it as foolproof as possible.
UPDATE: Mr.Mario also made a good youtube tutorial for this, if you prefer videotutorials you can watch his video:
UPDATE: The PS3 toolset is back online with support up to 4.90 ( https://www.ps3toolset.com ), i would recommend to use that instead.
Though this flash writer is open source and you can host it yourself at any time, it's a nice backup to have. While if the PS3 toolset goes offline you can't host it yourself as it's not open sourced.
Requirements:
Step 1:

Step 2:


UPDATE: Coro hosted this webpage on github if you don't want to host it yourself locally.
https://ps3addict.github.io/
UPDATE: Evilnat also hosted the webpage on his github: https://evilnat.github.io/flashwriter/
Though it's recommended to host it locally, so consider hosting it yourself unless you don't have access to a computer.


Step 4:


Step 5:


All done! You now run the latest CFW as of this was posted.
I made this tutorial so everyone can enjoy CFW on their PS3.
This guide was mainly focused as a response on people annoying developers asking how to host the Flash writer...
https://twitter.com/xXEvilnatXx/status/1633316555705528321
UPDATE: Mr.Mario also made a good youtube tutorial for this, if you prefer videotutorials you can watch his video:
UPDATE: The PS3 toolset is back online with support up to 4.90 ( https://www.ps3toolset.com ), i would recommend to use that instead.
Though this flash writer is open source and you can host it yourself at any time, it's a nice backup to have. While if the PS3 toolset goes offline you can't host it yourself as it's not open sourced.
Requirements:
- Computer
- Network connection
- CFW compatible PS3
- Empty FAT32 USB drive
- A brain to read the guide
Step 1:
- Check if your ps3 is compatible with custom firmware (Console must have a minimum version of 3.56 or below.)
- Check THIS page on the PS3 Devwiki or use this graphic to determine if your console is suited and what type of flash memory the console uses.
- [Optional] Check with minverchck PUP, this way you are 100% sure.
- Check THIS thread if you want to use Minvercheck.
- Installing Hybrid Firmware 4.90 over your existing firmware.
(It doesn't matter if you already run OFW 4.90 or anything below just install it over the current firmware.)
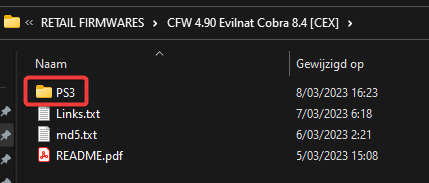
- Take a FAT32 Formatted USB drive and put the "PS3" folder in the root of the USB Drive.
- Go to your Playstation 3 system and plug in your USB drive in the most outer right USB port.
- Navigate to System update under settings & click X.
- Choose for Update via Storage Media
- Now follow through the installation steps and after installing the console will restart and you shouldn't notice anything obvious, other than the 4.82 webkit being restored within the 4.90 Firmware.
Step 3:UPDATE: Coro hosted this webpage on github if you don't want to host it yourself locally.
https://ps3addict.github.io/
UPDATE: Evilnat also hosted the webpage on his github: https://evilnat.github.io/flashwriter/
Though it's recommended to host it locally, so consider hosting it yourself unless you don't have access to a computer.
- Installing XAMPP to host the PS3Xploit Flash Writer (4.90 HFW) locally from your PC.
- Get XAMPP HERE (In this tutorial i will only be covering the installation and hosting from a windows device.)
- Once downloaded now run the .exe file by double clicking on it.
- Go through the installation process just click next.
- Once installed you should see something like this
- Now go ahead and download the PS3Xploit Flash Writer (4.90 HFW)
- Now click on Explorer within XAMPP and navigate to C:\xampp\htdocs
- In this folder make a folder ps3xploit and copy all 3 files from the Flash writer in there
- Now we are gonna determine the local ip adress from the PC we will be hosting this webpage from.
- Open CMD or powershell and write " ipconfig " without the " ofcourse. This will list all network adapters, with their ip's.
- In my case my local ipv4 adress is 192.168.0.128
- Now in XAMPP under Apache click start ( woohoo you are now self hosting this web page )
- You can now check if everything worked by surfing to [your ip]/ps3xploit on your pc, in my case 192.168.0.128/ps3xploit , you will see the webpage of the flash writer.
- Now we gonna patch the flash of the PS3 system
- Go to your PS3 and plug your FAT32 formatted USB drive in the most right USB port.
- Surf via the PS3 web browser to [your ip]/ps3xploit & you should see the web page
(In some cases antivirus programs block traffic to your pc on port 80, make a rule to accept that traffic or temporarily deactive the firewall.)
- Choose for the type of memory NOR or NAND and click X, if you used the most outer right port of your ps3, then you don't have to change the USB Flash Dumping Device
- Now on the next screen click "Run checks" this will check minimum firmware, if you are HFW, etc...
- If everything went right you should get the following screen
- Now click the Dump flash memory button and wait until you get the following screen
- Now unplug your USB drive and check if the flash dump is any good
- You can use this tool for it. Drag your flash file from your usb in the PS3dumpchecker folder.
- Drag the flash file over the .exe and it will start to check the dump
(this is only needed as a backup if an accidental brick occurs.)
- If you have a console with nand flash you need to use this tool to check.
- Now plug the USB drive back in the same usb port on the ps3 and we can continue
- I know it's in fact not needed to plug the usb drive back into the PS3 but i do it anyway for good luck.
- Now go ahead and click the Patch flash memory button. You will get the following screen, just give it some time from my experience it can take from 3minutes up to 15minutes to finish.
DO NOT UNPLUG OR TURN OF YOUR PS3 OR PC OR XAMPP or you'll end up bricking your console.
- Now wait until the patching operation is done and you'll be greeted with the following screen.
- Cool! Now we patched your flash memory and now we can install CFW, first reboot the console and we'll continue in the next step.
Step 5:
- Installing Evilnat 4.90 CEX CFW over the 4.90 HFW.
- Download the file HERE
- Take a FAT32 Formatted USB drive and put the "PS3" folder in the root of the USB Drive.
- Go to your Playstation 3 system and plug in your USB drive in the most outer right USB port.
- Navigate to System update under settings & click X.
- Choose for Update via Storage Media
- You will now be greeted with a screen that will show 4.90 Evilnat CEX
- Now follow the installation (it's very simple just read and follow through)
- The PS3 will reboot and you will be greeted with the nice Evilnat logo!
All done! You now run the latest CFW as of this was posted.
I made this tutorial so everyone can enjoy CFW on their PS3.
This guide was mainly focused as a response on people annoying developers asking how to host the Flash writer...
https://twitter.com/xXEvilnatXx/status/1633316555705528321
Last edited:


")