The selllers uses many names for that "conductive paper", sometimes is named RCB (ribbon circuit board)
There is a list here, incase you need to buy one check the compatibility
https://www.psdevwiki.com/ps3/DualShock_3#Ribbon_Circuit_Boards
The problem of the L2 is related with the RCB for sure
First you need to check the "copper pins" in the RCB (check the images uploaded in wiki, there is one where you can see the exact pin where is connected the L2), originally that pins had a goldie color and shiny but after years they could have a dark-brown color
In that case, you need to clean them very softly with alcohol and cotton, but dont insist while doing it because is not posible to return to the original goldie color
That brown substance are metalic particles (oxidation of the copper), and is deep into the copper
After that, you can use a graphite pencil to paint in top of them, i know it shound too much ghetto but the graphite is electrical conductive, it just works and is super easy
The other easy thing you can do is to increase the height of a "rubber piece" that pushes that pins. That rubber can be removed, insert a piece of cardboard under it, place the rubber again in his place and is done. Usually this tricks works even if the pins are very oxidized
And the last thing you can do... incase there is some line "broken" at a middle point... you can create your own "conductive glue", i was talking about it in the forum before, use the forum search engine with "conductive glue" or "graphite powder", etc...
In this post i was mentioning some of this things
https://www.psx-place.com/threads/ds3-not-charging.26833/page-2#post-213746
The fact that L3 and R3 works doesnt gives any hint, are lines completly separated from the sticks X and Y sensors
The first thing i would do is to disconnect the RCB and see if the sticks works fine without it, is long to explain but an intermitent connection in the pins of the RCB could generate "phantom button presses" (thats another good keyword for the forum search engine btw) and im not so sure if more unestabilities
At this point i dont think the problems in the RCB could affect the sticks, but im not so sure, so better check it
If you still have the problem in the sticks after removing the RCB i guess we are going back to this kind of talk:
https://www.psx-place.com/threads/dualshock-3-analog-stick-replacement.33361/#post-288957
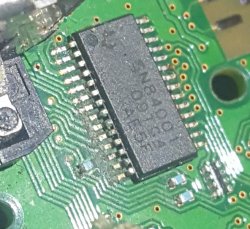
There are many differences in that circuit for every diffrent DS3 model, the model is printed in white texts
Wait, i dont understand well what you did, but better dont mess around touching in the pins of the pots (that little plastic squared blocks attached at the sides of every stick to meassure X and Y rotations)
You are not going to damage the pot itself... but there is a chip connected to them, im sure that pins have some kind of protection inside it but probably are very limited... one mistake and you can fry it internally