You are using an out of date browser. It may not display this or other websites correctly.
You should upgrade or use an alternative browser.
You should upgrade or use an alternative browser.
Thibobo
Member
@RIP-Felix My Achi Pro-SC V4 , all resistors, microscope, NOS BD3504, 0.6mm leaded bga balls, too much other stuff... all are on it's way to go the full franken way!
All of this to revive my own recently YLOD'ed CECHC04 in the first place, but in mind to revive as much BC PS3's that come on my path.
I came late to this thread but it really inspired me to finally get into the reballing game.
I have about 12 slims to master the machine & harvest 65 & 40nm RSX's from, glad i saved those boards when i harvested IDPS's from it back in 2014-2018.
Also bought a small electric oven to bake the boards for about 4-6hrs at 100°C to prevent the boards from popcorning
Will be using this heating profile posted by shawn:
R1: step
L1 0 d1 360 r2 1.00
L2 190 d2 30 r3 1.00
L3 200 d3 25 r4 1.00
L4 210 d4 25 r5 1.00
L5 220 d5 25 r6 1.00
L6 230 d6 25 r7 end
hb 230.
source:
https://www.psx-place.com/threads/reball-ps3-cell-rsx.32376/page-5
Is there anything else i should consider?
Rambonz
Member
@RIP-Felix My Achi Pro-SC V4 , all resistors, microscope, NOS BD3504, 0.6mm leaded bga balls, too much other stuff... all are on it's way to go the full franken way!
All of this to revive my own recently YLOD'ed CECHC04 in the first place, but in mind to revive as much BC PS3's that come on my path.
I came late to this thread but it really inspired me to finally get into the reballing game.
I have about 12 slims to master the machine & harvest 65 & 40nm RSX's from, glad i saved those boards when i harvested IDPS's from it back in 2014-2018.
Also bought a small electric oven to bake the boards for about 4-6hrs at 100°C to prevent the boards from popcorning
Will be using this heating profile posted by shawn:
R1: step
L1 0 d1 360 r2 1.00
L2 190 d2 30 r3 1.00
L3 200 d3 25 r4 1.00
L4 210 d4 25 r5 1.00
L5 220 d5 25 r6 1.00
L6 230 d6 25 r7 end
hb 230.
source:
https://www.psx-place.com/threads/reball-ps3-cell-rsx.32376/page-5
Is there anything else i should consider?
Yes reducing the ramp rate down to 0.5.
Bake for 24 hours at 110-130 (not what you've suggested). This is not optional if you want to save the RSX ram chips. You will get cracks and solder balls coming out if you cut this part short.
Bottom heater during L1 to a temp that gets you to approx 165-180 before the top heater even comes on.
Use an additional aliexpress K-type Thermocouple on the bottom of your board by the RSX.
By the time you hit L2 the board should be soaked with heat and the PV/SV should be synced, but you should also see very close bottom board temps (on the additional thermocouple), I mean within 1 degree close. If they're not, consider recalibrating your machine.
De-lid 90nms/65nms for an easier time.
I personally have a delidded profile and lidded.
Nudge at:
190 degrees for leaded
220 for unleaded
Don't de-lid 40nms while they're still on the board and use the razor blade method in hand.
Use foil tape around the RSX to protect all of the additional components. Then use a few squares of tinfoil with a hole in the middle (like a skirt) to prevent draft and help retain soaked heat. Foil skirt adds about 10 degrees for me so it's not insignificant
I have my Achii Pro SC bottom heater set to 280 for the full duration. my L1 is about 100 seconds longer but that's more to ensure it's soaked completely.
Thibobo
Member
Yes reducing the ramp rate down to 0.5.
Bake for 24 hours at 110-130 (not what you've suggested). This is not optional if you want to save the RSX ram chips. You will get cracks and solder balls coming out if you cut this part short.
Bottom heater during L1 to a temp that gets you to approx 165-180 before the top heater even comes on.
Use an additional aliexpress K-type Thermocouple on the bottom of your board by the RSX.
By the time you hit L2 the board should be soaked with heat and the PV/SV should be synced, but you should also see very close bottom board temps (on the additional thermocouple), I mean within 1 degree close. If they're not, consider recalibrating your machine.
De-lid 90nms/65nms for an easier time.
I personally have a delidded profile and lidded.
Nudge at:
190 degrees for leaded
220 for unleaded
Don't de-lid 40nms while they're still on the board and use the razor blade method in hand.
Use foil tape around the RSX to protect all of the additional components. Then use a few squares of tinfoil with a hole in the middle (like a skirt) to prevent draft and help retain soaked heat. Foil skirt adds about 10 degrees for me so it's not insignificant
I have my Achii Pro SC bottom heater set to 280 for the full duration. my L1 is about 100 seconds longer but that's more to ensure it's soaked completely.
Thanks for your reply, this info will come in very handy!
Do you mind sharing your lidded / delidded profiles?
Will order an additional thermocouple for underside, recallibrating the machine i'll have to learn when i have the machine on hand as i never used it before.
Do you use or recommend a jig to hold the motherboard? I've been told the jig and supports on the achi pro itself are more than enough.
I'm pretty sure you delid your 40/65nm or your rsx's in general before reflowing them back to the board, do you protect the die with anything or you just leave it fully exposed?
Do you have pictures of your setup with the skirt? You protect anything at underside of the mobo or just leave it as is?
Another question i have is, when you removed the rsx or reflowed an rsx on the board, do you put on the cooling fans or just turn off the machine?
Rambonz
Member
Thanks for your reply, this info will come in very handy!
Do you mind sharing your lidded / delidded profiles?
Will order an additional thermocouple for underside, recallibrating the machine i'll have to learn when i have the machine on hand as i never used it before.
Do you use or recommend a jig to hold the motherboard? I've been told the jig and supports on the achi pro itself are more than enough.
I'm pretty sure you delid your 40/65nm or your rsx's in general before reflowing them back to the board, do you protect the die with anything or you just leave it fully exposed?
Do you have pictures of your setup with the skirt? You protect anything at underside of the mobo or just leave it as is?
Another question i have is, when you removed the rsx or reflowed an rsx on the board, do you put on the cooling fans or just turn off the machine?
So I would say the profile you have there is a good starting point. But understand that each machine/environment must have a unique profile. You'll need to calibrate your own profile to get results. We don't say this because we don't want to make your life easier, it's just the harsh reality of BGA rework. My delidded profile just runs a little longer but i'm still looking for the same things, melting points don't change etc.
When calibrating the machine use the "auto tune" for the sensors, read the manual or watch a youtube video. I can't remember what button you press and hold etc but it essentially puts the machine into a mode where it runs through the profile and matches up the temps. Otherwise you'll use the machine and get temps that aren't accurate to the reported numbers and/or your heater will overshoot target temps by mistake and kill things. Accept that whatever board you put on for calibration is going to die.
The die on the RSX is the least of your worries. It's the ram chips that will cause you nightmares if you don't bake the chips before rework then the small amount of moisture trapped in there, when heated up, will cause the solder balls to pop out (not the balls under the RSX, I mean the balls under the ram chips that you cannot access). If you get even one pop out its game over. Your baking needs to be above boiling point and for a sustained period of time, the closer you can get to 18-24 hours the higher chance of success you're likely to have.
Jig, you're in luck. A supplier just restocked these. Choose the PS3-40G.
For the underside of the board I but foil tape over the bottom of the CPU. Over the NEC/Tokins. Over the white connectors. The rest is pretty much exposed.
Do not use the cooling fans until the board is off the machine. It just causes warping and realistically you need to get in a mindset of doing this slowly and correctly. Every step in this process needs to be executed perfectly and it's not easy. Be meticulous with this and don't rush, again not because we don't want you to be doing it quick but it's just required to have success.
Last edited:
Thibobo
Member
So I would say the profile you have there is a good starting point. But understand that each machine/environment must have a unique profile. You'll need to calibrate your own profile to get results. We don't say this because we don't want to make your life easier, it's just the harsh reality of BGA rework. My delidded profile just runs a little longer but i'm still looking for the same things, melting points don't change etc.
When calibrating the machine use the "auto tune" for the sensors, read the manual or watch a youtube video. I can't remember what button you press and hold etc but it essentially puts the machine into a mode where it runs through the profile and matches up the temps. Otherwise you'll use the machine and get temps that aren't accurate to the reported numbers and/or your heater will overshoot target temps by mistake and kill things. Accept that whatever board you put on for calibration is going to die.
The die on the RSX is the least of your worries. It's the ram chips that will cause you nightmares if you don't bake the chips before rework then the small amount of moisture trapped in there, when heated up, will cause the solder balls to pop out (not the balls under the RSX, I mean the balls under the ram chips that you cannot access). If you get even one pop out its game over. Your baking needs to be above boiling point and for a sustained period of time, the closer you can get to 18-24 hours the higher chance of success you're likely to have.
Jig, you're in luck. A supplier just restocked these. Choose the PS3-40G.
For the underside of the board I but foil tape over the bottom of the CPU. Over the NEC/Tokins. Over the white connectors. The rest is pretty much exposed.
Do not use the cooling fans until the board is off the machine. It just causes warping and realistically you need to get in a mindset of doing this slowly and correctly. Every step in this process needs to be executed perfectly and it's not easy. Be meticulous with this and don't rush, again not because we don't want you to be doing it quick but it's just required to have success.
Thanks! Do you remove the board and jig from the unit when it's still hot or you let it cool by itself first for a few minutes as it's probably super hot to touch?
I will take your advice for sure and bake the boards for 24hrs in before harvesting the rsx, is this much also needed for the board that will receive the new rsx?
Storing the harvested rsx's in a esd safe bag with silicagel is safe or should it be baked again when goin to use it?
Rambonz
Member
Thanks! Do you remove the board and jig from the unit when it's still hot or you let it cool by itself first for a few minutes as it's probably super hot to touch?
I will take your advice for sure and bake the boards for 24hrs in before harvesting the rsx, is this much also needed for the board that will receive the new rsx?
Storing the harvested rsx's in a esd safe bag with silicagel is safe or should it be baked again when goin to use it?
Personally, I allow the board to cool to about 70-80 degrees (C) before removing it from the BGA station. And I only remove it to speed up the cool down ever so slightly since the bottom heater gives off heat for a long time.
Also for me I've yet to have a board delam, so the concern has always been the RSX's. Delam absolutely happens though I just think I live in a country where the environment helps me on that. Personally, I would bake before any rework. That said, i've cut corners in the past and come out fine but attribute that to luck more than anything.
I store my RSX's in an esd safe bag with silicagel as well and they are all baked before they go in. I have had a chip that was stored for about a week in a bag with silicagel still pop solder balls though, so again I would recommend baking even with that storage method. It's usually not much more effort to just throw them all in the oven at once with the board it's going on anyway.
Thibobo
Member
Personally, I allow the board to cool to about 70-80 degrees (C) before removing it from the BGA station. And I only remove it to speed up the cool down ever so slightly since the bottom heater gives off heat for a long time.
Also for me I've yet to have a board delam, so the concern has always been the RSX's. Delam absolutely happens though I just think I live in a country where the environment helps me on that. Personally, I would bake before any rework. That said, i've cut corners in the past and come out fine but attribute that to luck more than anything.
I store my RSX's in an esd safe bag with silicagel as well and they are all baked before they go in. I have had a chip that was stored for about a week in a bag with silicagel still pop solder balls though, so again I would recommend baking even with that storage method. It's usually not much more effort to just throw them all in the oven at once with the board it's going on anyway.
Thanks for your answers!
When you harvest the RSX, you first bake the donor board then harvest the RSX, is it needed to bake the RSX again directly after harvested it, if you're wanting to use that RSX directly on a PS3?
Also do you store your harvested rsx's delidded or lidded? And do you bake long stored RSX's lidded or delidded?
Do you protect the ram chips from the rsx or the rsx in general from direct exposure, is it best to cover with a lid or doesn't it make a difference?
Last edited:
RIP-Felix
Senior Member
Reccomended bake time for a 1.5mm MB is 18 - 48hrs. Then rework should be performed within 4 hours, as the laminated materials soak moisture in fairly quickly. There's a whole how long you have chart based on relative humidity... but 24hrs @125C is a good catch all.
If you wont be doing the rework immedietly after the bake, then get some ESD bags and silica gell dessicant for long term storage. Maybe heat seal the bag with vacuum packer (don't need a vacuum, just the heat seal). That'll keep for years. Whenever you have time to get to them.
I tuned my profile for IHS on and I store them right after pulling, mainly because I don't feel like reballing them then and there.
Reflowing is easier without the lid, but can be done either way if you dial in your profile. Little spacer caps in the corner of the RSX help prevent bridging when the solder begins melting. That can be more forgiving if you reflow with IHS on.
DeadEnd
Senior Member
But I have already posted the measurements before... At least of the plastic. Did not look at the corner balls though...
View attachment 38089
View attachment 38088
View attachment 38090
Here is STL file for 3d printing (Untested)
To revive this , my measurements were off. I have now revised it and actually printed the piece with ABS plastic, so that it fits for sure. So here's the updated model (also reattached the corrected file in the original post).
Following corrections were made: the thickness of the base plastic was actually about 1.3mm and the distance between outermost sides in the middle square must be 17mm.
Attachments
Last edited:
Hasan Ahmed
Member
Hi
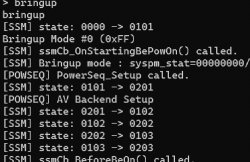
Where can I get the syscon training data page?
Where can I get the syscon training data page?
RIP-Felix
Senior Member
The what now?Hi
Where can I get the syscon training data page?
RIP-Felix
Senior Member
To be clear, you did this?Hi,
I used 2k2 and 4k7 resistors, both with 5% tolerance, and got ylod 3034/4002.
Are the resistors right? Just to make sure it was my bad soldering, because I didn't have boards to pick up resistors and I bought it.
That little landing pad above in the pic should read 0.951v and stabilize for about 1s before the YLOD, if you did the soldering correctly. The error code 3034/4002 is expected if the soldering is not correct. Be sure the resistors are corectly placed and soldered. Using hot air helps immensely, as thick ground plane nextbto a few of them make it very difficult to actually get them to solder to the pad. I'm willing to bet that's the issue.
Also, you should use 1% resistors, not 5%. But if the reading is close to 0.95 it should be fine.
I did the process and used 5% resistors, but I believe that the problem is the solder or the IC that damaged it, because the ylod is instantaneous. The device was working normally until the syscon step.
Is there any chance the problem is the 5% resistors?
Sorry for the bad english, I'm Brazilian
Is there any chance the problem is the 5% resistors?
Sorry for the bad english, I'm Brazilian
AlexandreTheGreatBR
Member
E bom ver outro brasileiro por aqui! e se interessando em fazer o mod que maravilha! conheci um técnico mês passado que já havia feito com sucesso a modificação e esse ontem ele finalizou o serviço no meu CECHA00, pretendo postar isso por aqui em breve pra divulgar o serviço dele e espero que você consiga realizar também pois quanto mais pessoas com esse conhecimento melhor seráI did the process and used 5% resistors, but I believe that the problem is the solder or the IC that damaged it, because the ylod is instantaneous. The device was working normally until the syscon step.
Is there any chance the problem is the 5% resistors?
Sorry for the bad english, I'm Brazilian
I soldered the resistors and the ci again, I got 3034/4002 again, here's the photo of the error I got and the moment it happens
The welds seem ok, would it be the 5% tolerance on the resistors that would be causing the ylod?

Attachments
M4j0r
Developer
Maybe this one https://www.psdevwiki.com/ps3/Talk:Rambus_Registers ?The what now?
Similar threads
-
-
 PS3 PS3 CECHA RSX Swap (40nm) – JP Limited – SYSCON Patch, VDDC Mod – Need Detailed Help
- Started by jw0710
- Replies: 4
-

-
