First of all I want thank you for your help and what you are doing. You are spending your time here to help me with this problem!
Then, I checked every point that I could. Every thing is ok.
Replaced nand:
View attachment 41249
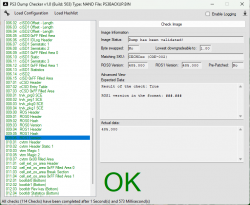
Nand 0 is ok too.
But I checked the southbridge solder and I press this and ps3 beeped without I touch on power. Is there a SouthBridge's(SB) balls problem? I try to boot ps3 pressing the SB without success, tried to boot ps3 pressing the SB and StatShip2 without success either.
I will replace the SouthBridge(and maybe StatShip2) but I need to confirm if its what I should do!
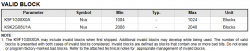
Look at here:
View attachment 41245
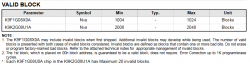
View attachment 41251
Basically:
Power On > Syscon talk to SouthBridge read the nand > SB try to talk with StatShip2 to send the data(balls problem)> Ebus Data error.
-> So, is syscon rails not connect directly to StatShip2 to make this error occur?(I think just chip start and voltage) It was what bring me to think that the problem should be on SouthBridge.
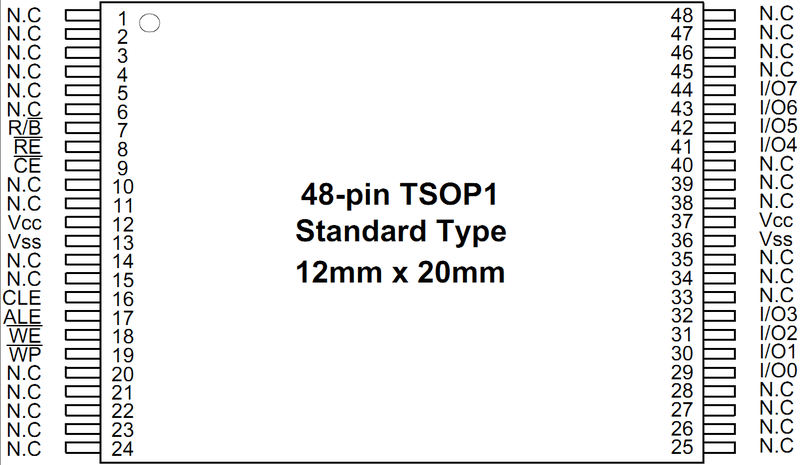
View attachment 41248
- NAND was correct soldered.
- The flash modules has voltages and resistances value ok.
- STATSHIP2 has voltages and resistances value ok.
- Maybe SouthBridge's solder balls is bad.
Additional information:
The board that I am try to repair is a CECHC. Look below the hardware information:
-> Syscon: Sony CXR713120-202GB different of my donors boards that has CXR714120-302GB.
-> Starship 2: CXD4302GB-1 different of my donors boards that has CXD9909GB.
-> SB: CXD2979GB
I have three COK2 motherboards here. Two donor and one with cold sold to check resistances value.
When PS3 bricked I used MFW Builder to do a custom firmware, the first update file worked good the second update file failed(SB balls problem?)
Yes, I did a custom firmware and update two times.
Questions:
Is there a chance that Syscon bricked on I update? Solutions? (I don't why it's just for curious)LOL
Is there a chance that my dump is bad even though the dump checker gives ok? Solutions?
What I can do before replace the SouthBridge?(I will use another SB)
Can I change the StatShip2
CXD4302GB for
CXD9909GB once its on COK2 board too?
Conclusions:
I don't know if it's a system file problem anymore once I don't know how to check this dump better. My last try will change the SB I hope that its work!