Dont be afraid of soldering in game controllers, i use to say thats a nice way to practise soldering because the only thing you are risking is the controller, you know... is way different than soldering in the console motherboard because a mistake in the motherboard could kill the whole console, but the controller... meh... are cheap... same rule applyes to any other peripheral (are always cheaper than the console)
Nowadays finding an official DS3 is tricky, that argument goes against what im saying, but anyway... there is a point where the sticks are going to be so damaged that you only solution is to bite the bullet and take the risk of replacing the sticks... and it seems you are close to that point

I found some photos to show you the tricky part of the procedure
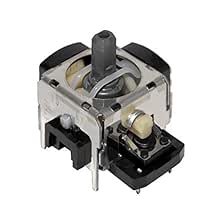
This is a new stick, is like a dice made of metal (im calling that metal dice the "body" of the stick). Note at his most bottom it have 2 metal "pillars" at the corners, right ?
This 4 pillars are inserted in 4 holes in the circuit board, and are only intended to give it structural resistance
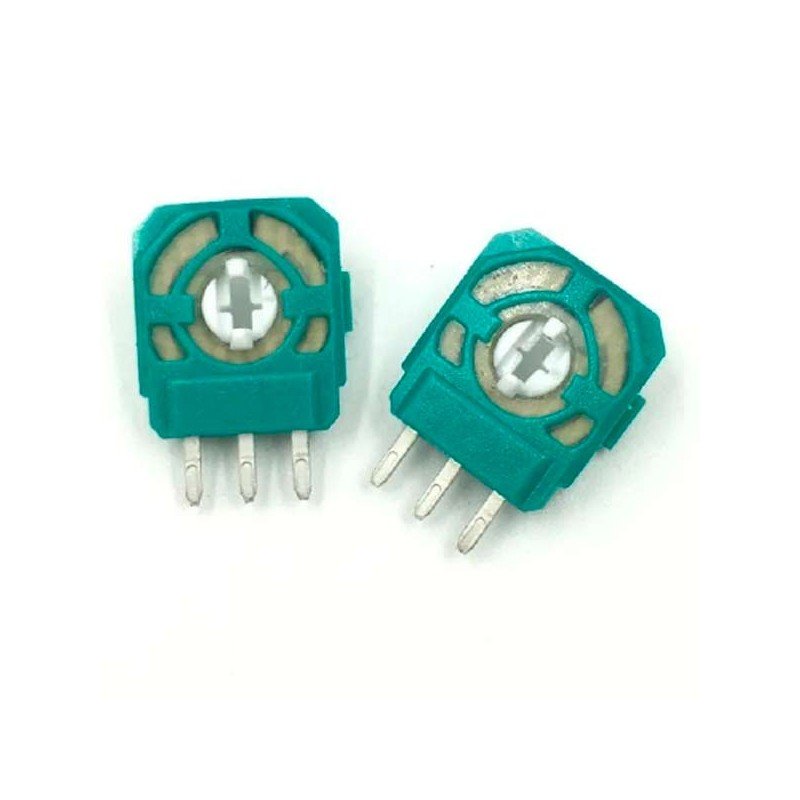
At the other sides of the body (not visibles in that photo) are the pots (potentiometers), the pots have 3 or 4 pins each (depends of the DS3 model). The pots are attached to the metal "body" by plastic clips (fragile, be careful), by pressing the clips you can pull from the pot to separate it from the body... but separating them is your decission, if you are not going to replace the stick entirelly there is no need to desolder the pots, this allows to remove the stick from the circuit board without removing the pots
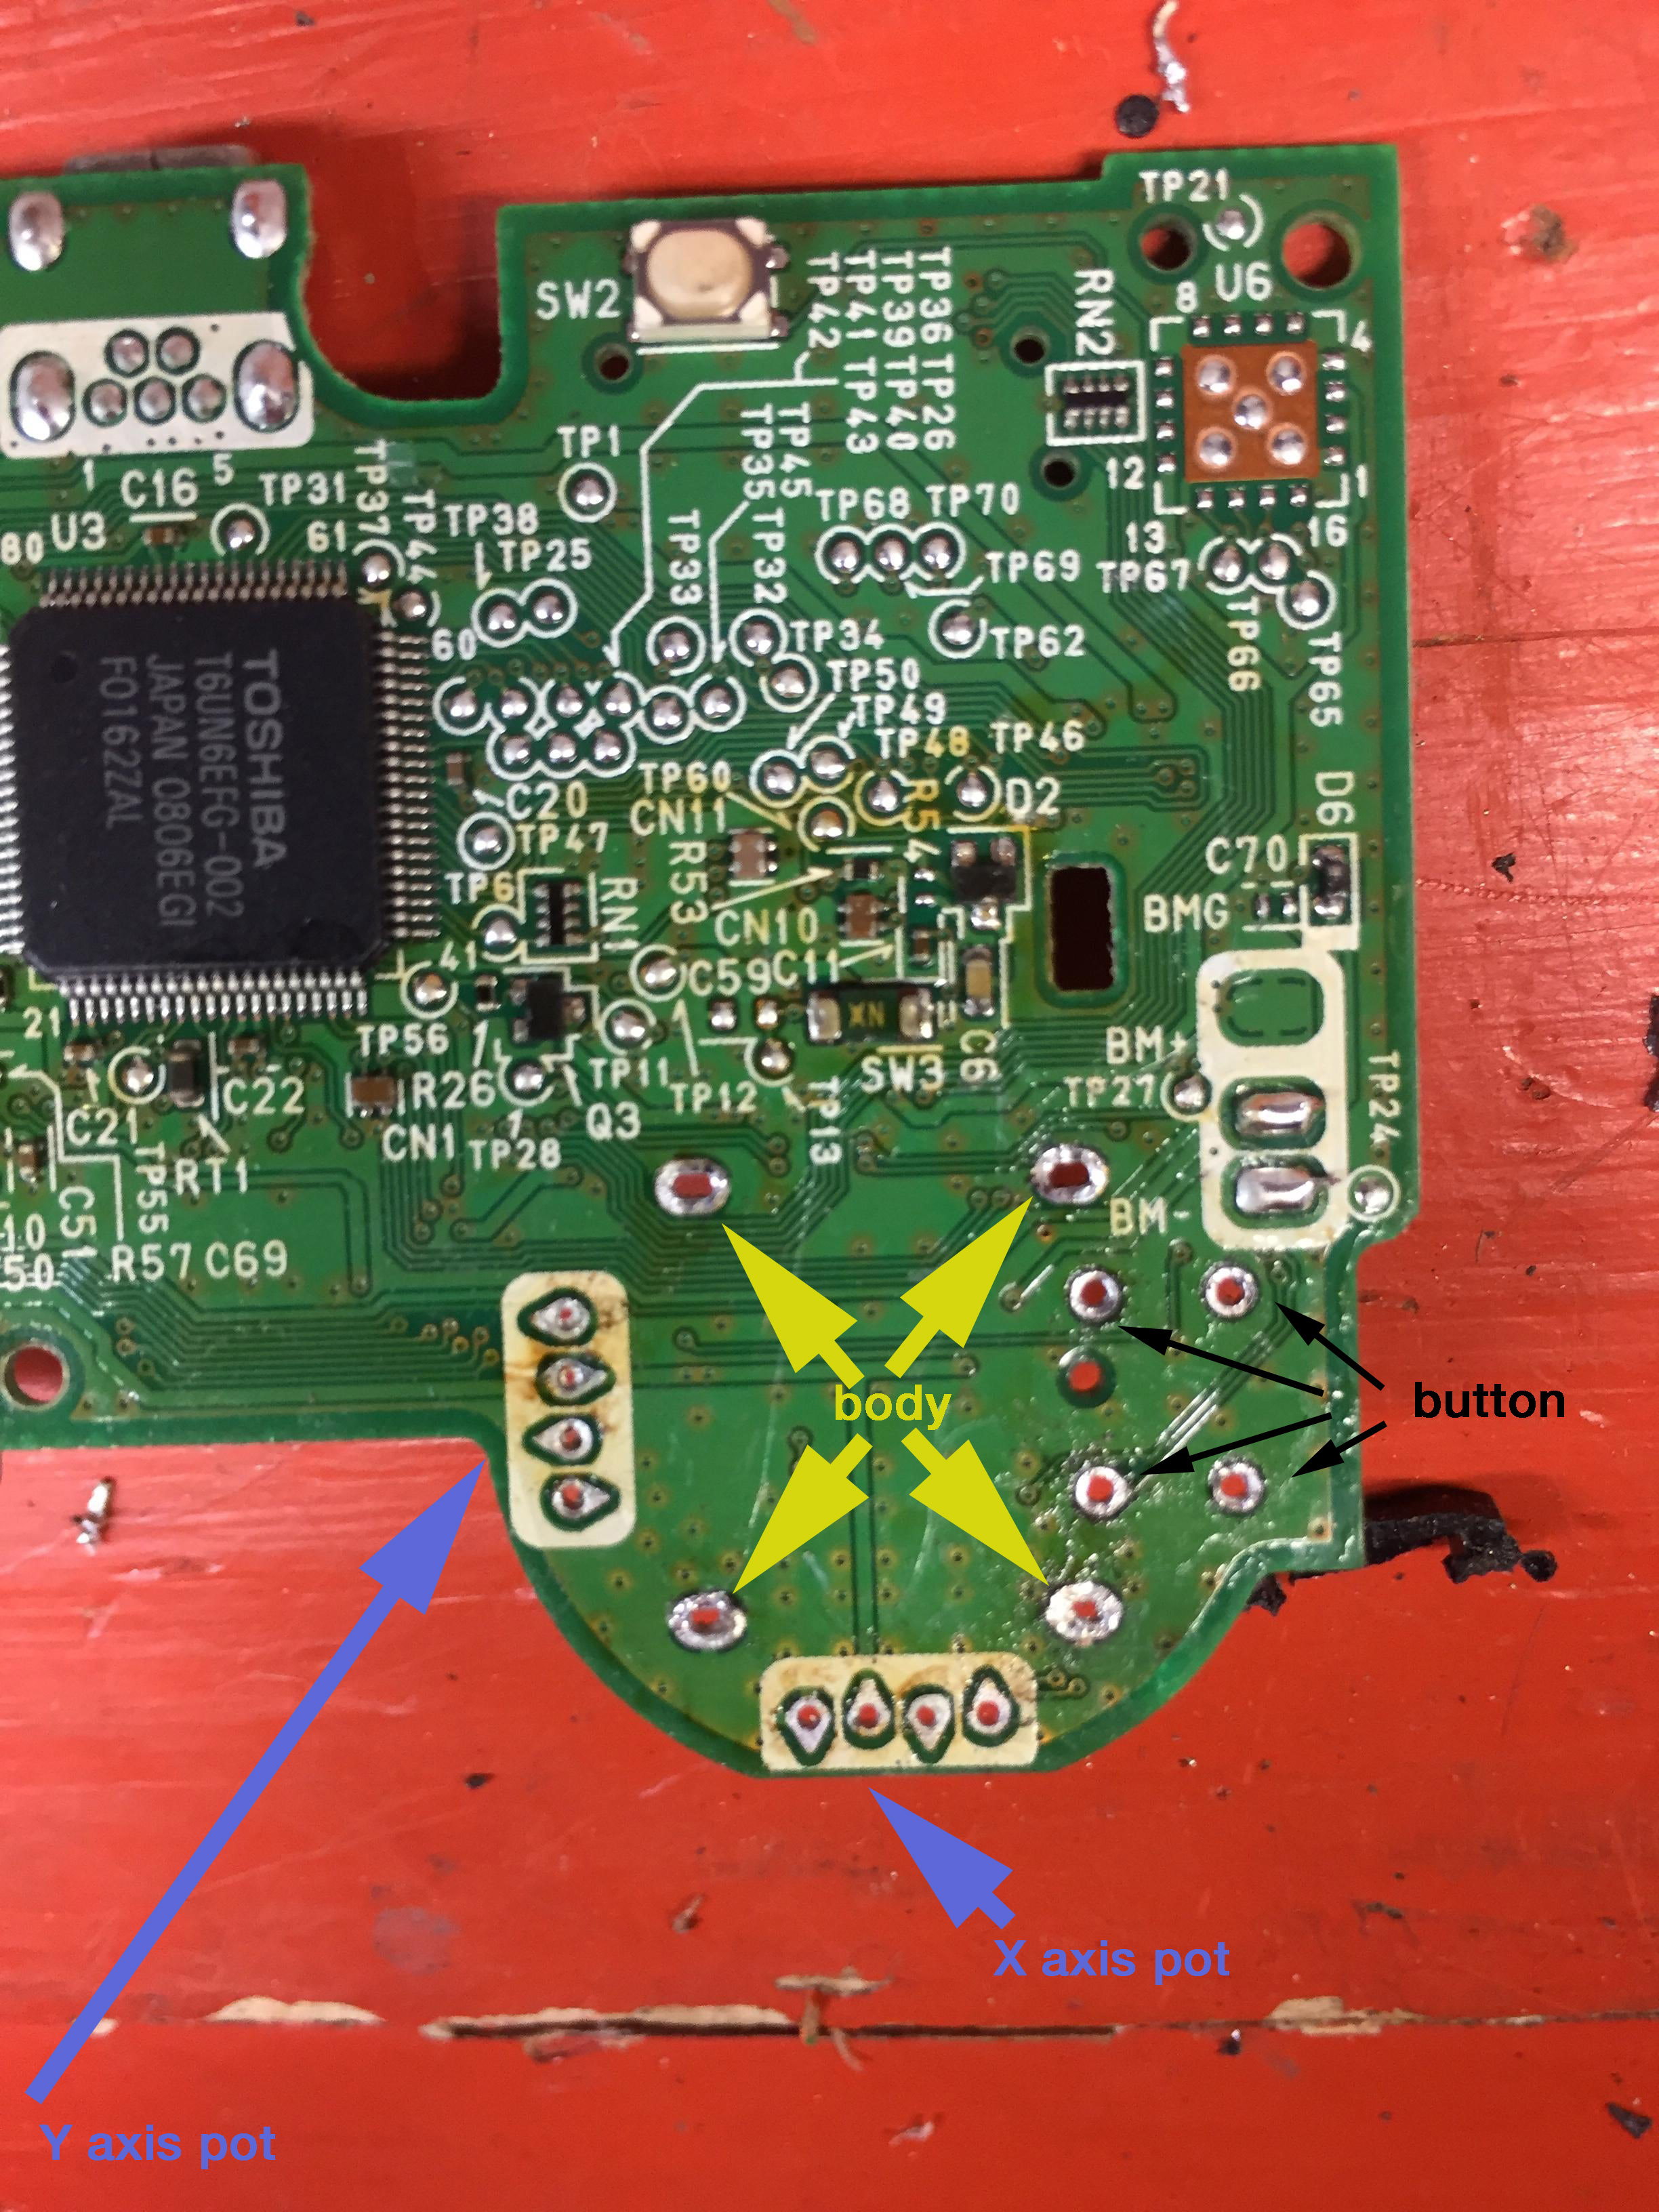
And the whole thing needs to be desoldered like this
-the 4 "pillars" from the "body" (structural)
-the 8 or 6 pins from the pots (optional)
-the 4 pins from the buton (you know... is the button named L3 or R3, when we press the sticks)
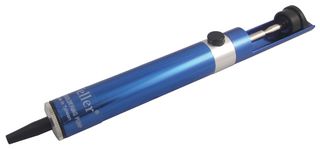
The easyer way to desolder all this is to use a "desolder pump" the goal is to "empty" the holes one by one... you heat the solder point and then with the pump you "suck" the solder in it
*Another way to do it is with "desolder braid"... same story... your goal is to "empty" all the holes one by one... but using desolder braid is a lot more tricky... the good thing is you can make your own desolder braid for free at home with any electrical copper wire (the ones with lot of thin copper threads)... this wires also have the same effect than the commercial desolder braids because they "attracts" the solder
*And btw be very careful to dont overheat the pins and the "body" with a powerful solder iron (or huge temepratures), keep in mind all this metal pieces are directly touching with plastic pieces and there is a huge amount of heat transfered from the metal ---> to the plastic
So try to do the solder job as fast as posible, and with a low power solder iron if posible, otherway you can use a powerful solder iron, but dont touch the metal with it more than a couple of seconds, this way you are reducing the heat transfered from the solder iron ---> to metal pins/body ---> to plastic pieces
 )
)")
 . Might try it on a older more battered controller to practice with the tricky part.