PS2 PS2 Slim with OPL 1.1.0: Using the Eye Toy Cam

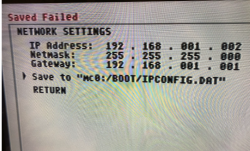
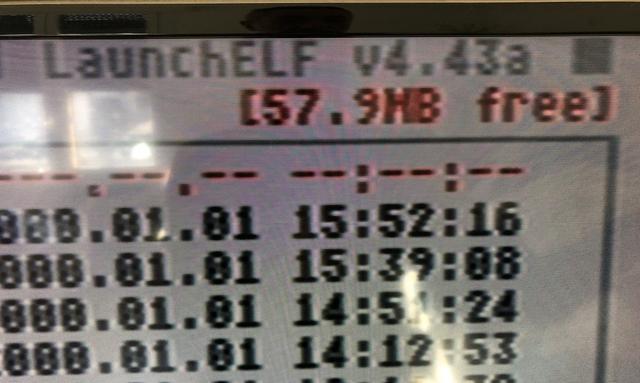
when I'm in "uLaunchELF" to change the LAN settings, after having changed them (as in the photo) I go to save and I get the error "saved failed" (in red at the top).

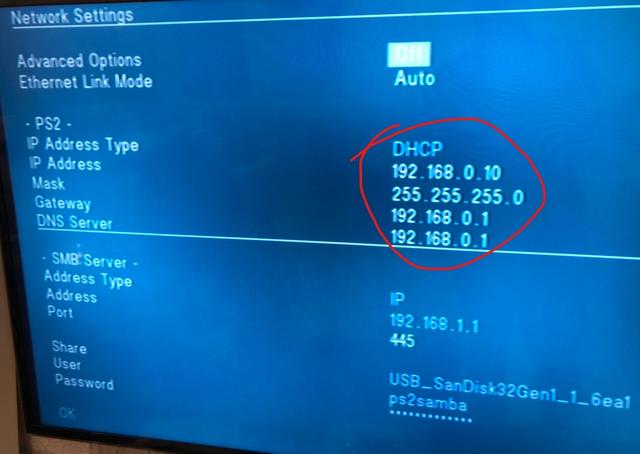
I then think I understand that these values set/saved in "uLaunchELF" should then pass into the OPL settings: however, if I enter OPL (network setting) I see incorrect values:

IP address 192.168.000.010
Netmask 255.255.255.0
Gateway 192.168.000.001
 

Attachments

  • upload_2026-1-31_17-52-37.png
    upload_2026-1-31_17-52-37.png
    1.2 MB · Views: 32
Last edited by a moderator:
Let's do the following:

1. In uLaunchELF, navigate to the following path:

mc0:/SYS-CONF

Make sure the "IPCONFIG.DAT" file exists in the path.

2. Check the network configuration in UlaunchELF again, take a screenshot, and show it to me.

What's shown in the network configuration in UlaunchELF is what you need to change in the network configuration in OPL.

Let's disregard the "save error" for now.
 
Here's a screenshot of mc0:\
There's no SYS-CONF folder, so I assume the IPCONFIG.DAT file isn't there either.

 
Last edited:
On that screen, in the upper right corner, it shows the amount of free space. I suspect your memory is full, so I suggest freeing up space and trying to create the IPCONFIG.DAT file again.
 
Let's simplify things.
Let's rethink the plan and do the following:
1. Open OPL and access the network settings. Adjust the parameters as shown in the screenshot and save the changes.

(This configuration will work if you correctly completed step 1: preparing your USB device with the DVD, CD, ART, etc. folders in the root directory.)

OPL saves a network configuration file in "mc0:/OPL/conf_network.cfg". It doesn't need the IPCONFIG.DAT file (I was mistaken about that :oops:).

2. Check if the games now appear in your list.
 
Maybe there's some setting on this screen that needs to be changed?

Exactly, I forgot that screen where you also have to specify the shared folder, so it looks like this:

ETH Prefix Path USB_SanDisk32Gen1_1_6ea1

try it now
:cheerful:

Edit:

Simply checking "DHCP" means you can forget about the parameters; this option is recommended so that the router automatically assigns an address to the PS2, preventing connection errors.

The important thing here is to configure the parameters correctly in the "SMB Server" section.
 
Last edited:
Unfortunately no, I don't see any games.
Settings screenshot


Network settings screenshot


OPL screenshot (no games)
 
They are not appearing because you are trying to load the games in "BDM Games" mode. You must look for "ETH Games" mode by pressing the directional pad to the right on the controller and then pressing "x" as indicated in the menu to list the games.
 
If I move with the pad to the right I can only select apps: there is no eth


If I move with the pad to the right I can only select apps: there is no eth


Are there any other settings to enter in OPL?
 
Last edited by a moderator:
Sorry if I'm missing details, but I'm in a hurry. You can't select "ETH Games" because it's set to "off". In the "Settings" section, you need to set "ETH Devices Start Mode" to Manual, and that's it.
 
Now the screen is activated by moving the cursor to the right. I click X (run) but an error message appears: "301: cannot log into smb server".

Maybe remove user and password settings on the smb server?
 
Last edited:
Let's do the following:
1. Access your router's settings in a web browser.
2. Look for an "FTP" option and enable the server. If it's not already enabled, enter a username and password, and save the changes.
3. In your router's settings, find the path you assigned to the FTP protocol (look for an option like "USB Devices" or something related to "USB").
Note: An example address could be "ftp://192.168.1.1".
4. Download FileZilla Client

https://filezilla-project.org/

5. Launch FileZilla and enter the corresponding values.
Example:
Server: ftp://192.168.1.1
Username: The username you entered in your router's FTP settings.
Password: The password you entered in your router's FTP settings.
Port: Leave blank.
6. Click "Quick Connect" and then click "OK" on the warning message that appears.
7. On the right, there is a section called "Remote Site," and below it, you will see the contents. Take a screenshot and show it to me.
 
Don't worry, I'm just trying to understand how your router organizes your folder structure.
So do the following:

1. Open a command prompt (cmd) as administrator.

2. Type:

Code:
net use U: \\192.168.1.1\shared folder /user:user password

Note: Replace shared folder with the name of your shared folder, and username and password with the username and password you entered in your router's Samba settings.

3.-If "the command has been completed successfully" appears, type:

Code:
U:

If not, try again; sometimes it fails.

4. Once in your unit, type:

Code:
dir

5. Take a screenshot and show it to me.

6. Delete the created drive by typing:

Code:
net use U: /delete /y

7. A message will appear saying that U: has been deleted, type:

Code:
exit

The console will close.

Note:Press the "enter" key after each command
 
the first command sent gives a positive response but U: does not appear


if I try again, as you can see it responds with an error (85)
 
You're getting error 85 because you've already assigned the drive letter; that is, you successfully completed the second step.
Now you just need to navigate to that drive letter you created by typing:

U:

As in step 3 and then continue to the other steps.
 

Similar threads

Back
Top