PS3 SYSCON Tutorial (Windows)

Is it possible with the method shown in part 1, the one used by the browser, to clear the errors as if using the >$ errlog clear command? I'm asking because i asked a seller to show me the screenshot but all 31 errors shown show 0xFFFFFFFF and date 01 Jen 1970 00:00:00 GMT,
what does this mean?
IMG-20231009-WA0003.jpg
 
Try changing the nectokin, some of them are burned, you must match them, they have a lid and you will see in the black corner part that they are already burned and you must change them.
My slim ps3 doesn't have tokins, it was a later model that came standard with tantalums, but you could just be right! I reckon it will either be a dead CELL buck converter (ps3devwiki page) or busted capacitor as you said. Maybe BGA too? I'll try debug the south bridge tonight.
 
My slim ps3 doesn't have tokins, it was a later model that came standard with tantalums, but you could just be right! I reckon it will either be a dead CELL buck converter (ps3devwiki page) or busted capacitor as you said. Maybe BGA too? I'll try debug the south bridge tonight.
What does the becount command say? Capacitors have a certain lifespan if used within thermal limits.
 
What does the becount command say? Capacitors have a certain lifespan if used within thermal limits.
Becount for some reason kept saying that the command was invalid, I could only auth in with lowercase. Happy to try again though if you have wisdom to put out. I reckon the total uptime of this unit would be huge, but I can't be sure. I wanted to know too!
 
I have a broken Sherwood (CECH-2102A) console, the error log has error 20 3010 and 20 1201. I am unsure of which one to follow (signs point to 3010). full syscon commands below. (internal)
Code:
# CODE     CLOCK
# A0203010 FFFFFFFF
# A0203010 FFFFFFFF
# A0203010 FFFFFFFF
# A0203010 FFFFFFFF
# A0201201 FFFFFFFF
# A0203010 2CB517C1
# A0203010 2CB51669
# A0203010 2CAFC524
# A0201201 2CAFC524
# A0203010 2CAFC518
# A0203010 2CAE51C2
# A0203010 2CAE51B7
# A0201201 2CAE51B6
# A0203010 2CAE51A7
# A0203010 1AFC8C17
# A0203010 1AFC8BD6
# A0201201 1AFC8BD5
# A0203010 1AFC8BC7
# A0203010 1AF50AA9
# A0203010 1AF50A94
# A0203010 1AF50A86
# A0201201 1AF50A86
# A0203010 1AF50A7D
# A0203010 1AF504BD
# A0203010 1AF50482
# A0203010 1AF4A387
# A0201201 1AF4A386
# A0203010 1AF3D502
# A0201201 1AF3D501
# A0203010 1AF3C525
# A0203010 1AF3C3BF
Code:
Press Ctrl+C to exit
>$ bringup
00000000
# [SSM] Bringup Start.

Press Ctrl+C to exit
>$ shutdown
00000000
# [SSM] PS0 ok.
# [SSM] Msg 2687 : being delayed.
# [PowSeq] Error:A104
# [SSM] PS1 ng.
# [SSM] Cond/Fatal received, msg=2687.
# [SSM] Fataldown Start.
# [SSM] Fataldown ok.
# (PowerOff State) (Fatal)
NG E00000E0
# [SSM] Clearfatal Start.
# [SSM] Clearfatal ok.
# (PowerOff State)

Press Ctrl+C to exit
>$
1201 is RSX overheat error. Step number 20/21 is at the intialization stage when CPU and GPU are first powered. So it could be a bad thermal monitor or internal diode. Start by delidding and replacing TIM. Then Thermal IC.

The caps are fine.
 
SYSCON TUTORIAL (WINDOWS)
Disclaimer:
While it's a relatively safe and easy process, this tutorial involves some risk of harm to you and your console. If you proceed, you do so at your own risk.Please read the entire tutorial thoroughly before attempting.

LED Diag Mode (Rediscovered):
Note: So far I have only confirmed it worked on a CECH-3001A. OP said it worked on his CECH-2101 and 2501. @Nascar1243 and I have confirmed it doesn't work on, A through 20xx models. So all phat models and the 1st slim. It also doesn't work on Super Slim models, since they don't have an eject button. This only works on 21xx - 300xx model slims.

While reading the dev wiki boot options I came across an old post from 2012 by Euss who found a secondary error code system in slim PS3's that displays blinking LED patters similar to how the XBOX 360 error codes can be accessed using a button combination. He was able to access the led pattern but couldn't find a consistent method to do so and didn't know how to interpret it. In a thread by @VTSTech called PS3 LED Diagnostics, member @blackoes found a consistent method to access it. @Nascar1243 and I were able to make sense of the error code it displays. More on that later.

How to access the LED DIAG Mode:
  1. Be sure the console is powered off. No standby LED.
  2. Hold the EJECT button on the front pannel and power the console into standby. Continue holding EJECT until the Green LED illuminates solid. Flipping the PWR rocker at the back or by plugging it in, depending on model. This performs a fan test. It'll ramp up the fan to 100% for about 10s or so, to blow the dust out. Then it'll go back to standby, or tripple beep if there was a general hardware error.
    • NOTE: The general hardware failure is infamously know by the moniker "Yellow Light Of Death (YLOD)," but is actually indicated differently depending on PS3 model...
    • L - 20xx models there is a Yellow LED followed by a tripple-beep and it flashed Red thereafter. (traditional YLOD)
    • 21xx flashes the RED LED twice, then tripple-beeps, and flashes RED thereafter. (RLOD)
    • 25xx onward do not tripple beep or flash red. It just shuts off the LED. (noLOD)
  3. After the fan test has completed press the power button 3 time in a row. Not too quickly. Give it about a 1 second count between presses. One one thousand, two one thousand, three one thousand.
  4. Press the EJECT button 3 time in a row. Each time it'll tripple-beep. Press it again after the tripple-beep has completed. That's a good gauge of how long between presses you should wait before pressing it again.
  5. Press the Power button twice more and it'll begin the LED pattern.

How it works:

There will be a RED and GREEN LED that flash together, which mix together to make a Yellow LED - This is a YLOD. It's just hidden in some models. I found that interesting. But beside the point. This Yellow LED indicates the start/end of the sequence.

It will flash 4 times either Red or Green...Pause...then repeat another 4 flashes. it repeats this four times. This forms a 4-digit code that correspond to the last error the console encountered.

Here's an example form my my own KTE-001 motherboard from a CECH3001a slim PS3.
Code:
GGRG
GGGG
GGRG
GRGG
The LED sequence is Binary where, Green = 0 and Red = 1. So it means...
Code:
GGRG = 0010 = 2
GGGG = 0000 = 0
GGRG = 0010 = 2
GRGG = 0100 = 4
Use a hexidecimal to binary converter to interpret the 4 digit segments. The four digit error code I had was 2024. I retrieved the SYSCON errorlog to confirm the last error code was indeed an A0002024. This console has a bad wifi/blutooth module and I harvested the 40nm RSX for for a Frankenstein phat PS3 mod.

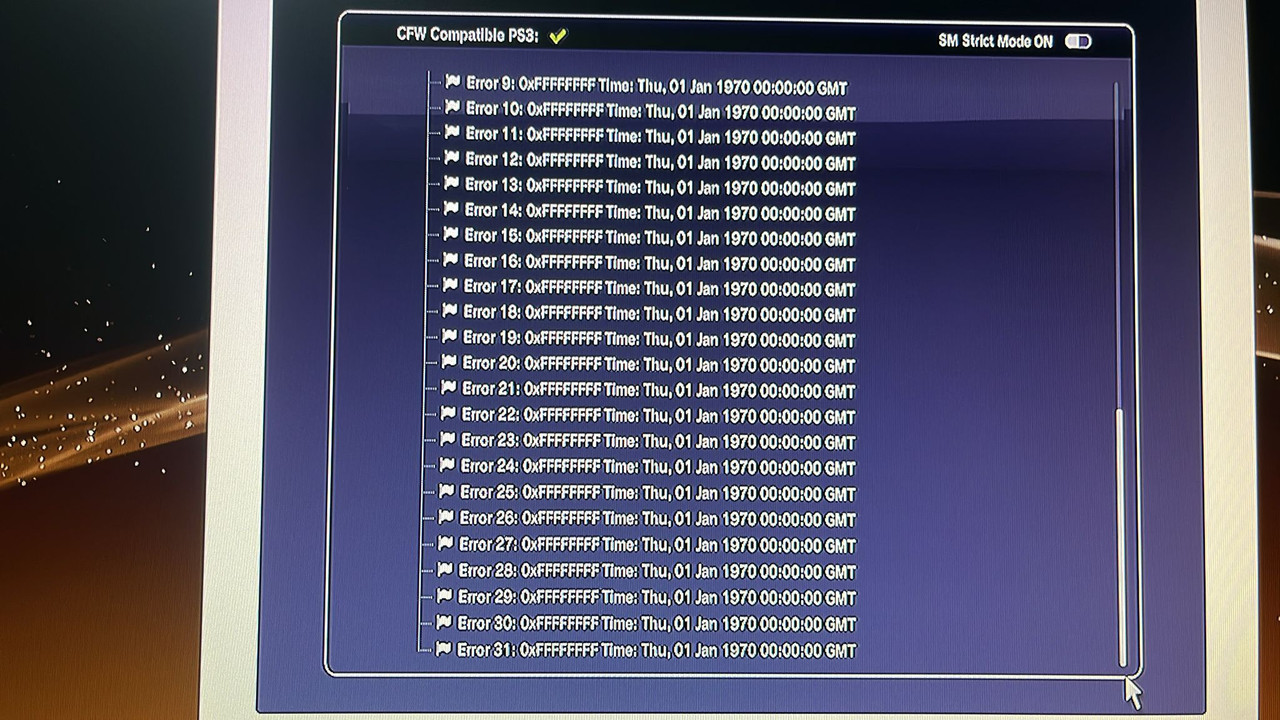
It is of note that the error code can include letters...
Code:
GRGR = 0101 = 5
RRRR = 1111 = F
RRRR = 1111 = F
RRRR = 1111 = F
Unfortunately there doesn't appear to be any way to access the next error in the log. If there is I'm not aware of it. Perhaps pressing it more times on step 5. If anyone finds a way, let me know. Also, it only displays the last four digits of the error, so it's doesn't contain the step number which tells you at what time in the power on sequence it occurred. Like immediately after SYSCON reset, standby, during POST, power on state, or shutdown. Those are useful to understand and rule out what kind of causes might explain the 4-digit error code. But it's better than nothing.

If your console turns on:
You can bgtoolset to retrieve the errorlog and usage time on PS3toolset.com.
  1. Turn on your PS3
  2. Go to Setting --> Date and Time Settings --> Date and Time --> Set via Internet
  3. Open a the internet browser and press :but tri:to bring up the options side menu.
  4. Set your home page to a blank page
  5. Then go to tools and Delete the cookies, search history, cache, and authentication data.
  6. Exit the internet browser and relaunch it.
  7. Now press :but start: to enter a URL. Type in PS3toolset.com and press :but start: again to navigate to the web page.
  8. Accept the "Do you want to run the plugin?" popup. Choose yes to continue.
    • If there's an error here, close the internet browser and restart the console. Then try again. Sometimes it requires a fresh boot.
  9. One it loads, click on the "System Manager" tab. Scroll down to the bottom of the list and expand the "Errors" list by clicking on the triangle next to it.
    • CAUTION: There is sensitive information about your console listed here! Your PSID and IDPS can be stolen if you post pictures of this screen on the internet. Cheaters can use this information to get their console unbanned and then cheat using it. If they get caught again, it can get both their console yours banned.
    • To prevent this you can hide this information by clicking on the IDPS and PSID and choosing "Hide". It will be replaced with XXXXXXXX. Currently (at the time of writing this) this information is not hidden by default. I've asked @bguerville if he can do this by default just so people don't inadvertently post it. They would have to unhide it to see it. He may have already added this feature by the time you read this.
  10. just above the errors, the last entry in the "System Info" nest is the Statistic which shows the number of startups (boot count), shutdowns, and total runtime (in 24hour days). I recommend you scroll the errors down such that your picture of this screen contains the usage time, but nothing above it. For example.View attachment 41309
  11. I've also asked bguervill if he could add an errorlog dump option that would dump the errorlog to a text file on a FAT32 MBR formatted USB drive in much the same way a flash backup is dumped. This feature may have been added by the time you read this. As of the writing of this tutorial it hadn't yet.
If your console is having a random YLOD and has not been jailbroken previously, DO NOT JAILBREAK! If the YLOD occurs during the jail breaking process you can brick your PS3! So the console needs to be stable enough to jailbreak. Of course, if you can't turn on your PS3, you're going to skip this part and continue onto the UART portion of the tutorial to directly communicate with the SYSCON chip.

If for some reason you cannot get onto PS3toolset.com (like your bluetooth/wifi or Ethernet adapter is malfunctioning) you can use custom firmware to dump the errorlogs. Recent Evilnat custom firmware has this option in CFW tools built in, but if your console isn't stable and you're on an older CFW it's not advisable to update. If the YLOD occurs during an update, it could brick. In this case, you can still retrieve the SYSCON errorlogs...

@M4j0r made an application that can access some of the SYSCON information from within @bucanero's PS3 Advanced tools app. You'll need a console with custom firmware (jailbroken). Place the PKG onto the USB and install it. Run the Advanced Tool and choose the option on the left at the end of the list. The one to dump SYSCON errlog. The console screen will go blank and restart. The errorlog will be saved to your USB drive.

This is useful to those who have CFW and who's console only has a YLOD during intense games. Or for anyone who would like to retrieve the errlog and becount from their working console, just out of curiosity. But for some reason cannot access PS3toolset.com.

If your console doesn't turn on:
You'll have to continue onto the UART diagnosis by connecting directly with the SYSCON chip.
  1. $2-10 - Buy a USB to TTL Serial Cable. It must be 3.3v or be set to 3.3v! Note: the adapter I linked here is what I use and did not require special drivers. It was automatically recognized and setup correctly after plugging in. Other adapters may require special drivers and manual setup.
    I recommend male to female jumper wires. One end has male pin connectors that are great for the USB adapter I linked above. The other end has female connectors great for other popular USB adapters that have male pins instead. You can just cut the end off the side you don't need and solder that end to the RX, TX, and DIAG pads. You might need to get longer wires for that type of adapter, or just use a USB extension cable to reach your computer.
    I recommend this Soldering iron. If you are going to get into repairing your own consoles, especially the PS3, then you NEED a good temperature controlled soldering iron. I recommend the one linked above, but you can decide for yourself. If you decide to get this iron, then I also recommend the following tips... T12-C4 has the thermal mass and area needed to power through the thick ground plane on the PS3. I set it to 340C and use it with solder braid to clean solder from the NEC/TOKIN rails. It's the only tip that can drive the heat into the board there. DO NOT EXCEED 350C or the copper pad can alloy with the solder and be destroyed. 350C is safe, and you can go higher for brief periods of time if you really need the extra heat, just don't linger there too long or it can destroy the pad and your tip! T12-JL02 is great for drag soldering fine pitch pins of ICs and microsoldering tiny SMD components. It won't work near ground planes or thick copper pads that don't have thermal relief. For them, and the best general purpose tip, get a T12-D24. That's the one I use the most, bar none.
  2. Solder a wire to the RX, TX, and DIAG test pads on your motherboard.
    Note, you do not need a DIAG wire for these models.View attachment 41332
    Note, you do not need a DIAG wire for this model.View attachment 41334
    Note, you do not need a DIAG wire for these models. Also, in the picture below SC = SYSCON and SB = South Bridge. You can connect to the south bridge UART using those pins. But that's a more advanced process I won't cover in this tutorial. SC_RX and SC_TX are the pins you need.View attachment 41329
    MSX-001, MPX-001, NPX-001, PPX-001, PQX-001, RTX-001, and REX-001. Note, you do not need a DIAG wire for these models.View attachment 41323
  3. Download current SYSCON script.
  4. Download Python and install it as follows...
    In the setup CHECK THE BOX "Add PYTHON to PATH." This will allow you to use a windows CMD terminal to access the SYSCON. View attachment 41333
  5. Plug the USB UART adapter into your computer.
  6. Be sure your adapter is set to 3.3v. Some adapters are selectable between 3.3v and 5v. Consult you adapters documentation to be sure it's set to 3.3v! Otherwise it could destroy the SYSCON chip and your console!
  7. Navigate to Device Manager and find which COM PORT windows assigned the USB adapter.
    On windows 10 you can just search for "device manager." Then look under Ports for the USB adapter. Mine was given the name "Prolific USB-to-Serial Comm Port (COM4)." The information I need is the "COM4", that's what I'll need to put into the command line to gain access to my SYSCON. Yours may be different. If you don't recognize the name it was given and are not sure which one it is, just unplug the adapter and watch to see which one disappears, then plug it back in and it should appear. Remember which USB port you plug the adapter into and use the same one from now on. It may assign a different COM port if you use a different USB port.View attachment 41326 View attachment 41327
  8. Now open a Command terminal as an Administrator.
    On windows 10 you can just search for "cmd", then right click on the app and choose "run as administrator" in the dropdown box.View attachment 41324
    You need to install some needed dependencies now. First, type in the following command.
    Code:
    pip install pyserial
    Follow the prompts if there are any. Next, type in this command:
    Code:
    pip install pycryptodomex
    Follow the prompts if there are any. When I first did this it prompted me for an update and explained how to do it. So just follow instructions. You should get a message confirming a successful install after each command. These dependencies must be installed or the SYSCON script won't work! Also, you will get errors about PYTHON not being recognized if you didn't check the Box to add PYTHON to path when you installed it.
  9. Now you are ready to gain access to the SYSCON.

A - K Models (COK-001 to DIA-002)
External Access Mode: Easier to access, less you can do.
  1. Connect RX & TX wires. DO NOT CONNECT DIAG.
  2. Connect GND on your USB UART adapter to a GND on the PS3
  3. DO NOT ground DIAG! Leave it unconnected for now.
    • We are just grounding the USB adapter to the console. The RF shield is the most convenient place to ground the USB adapter to. Or the copper ring around the perimeter of the motherboard will work. Alligator clips work great. You do not need to solder a connection! This is just to be sure the computer and PS3 are sharing the same GND reference. It's not strictly necessary, but good practice.
  4. Be sure that the PSU is plugged in. To both the 5v and 12v connectors. Technically, the 2 prong 12v connector is not needed to power and access the SYSCON, but you will get an error without the 12v connector if you attempt to power on. Just be aware of that.
  5. Flip the PWR rocker if your PS3 has one, or plug it in so that the standby LED illuminates.
  6. Open the folder containing the SYSCON python script you downloaded earlier. At the top of the window there is a filepath box. Click on the file path and it'll highlight. If you type CMD into this bar, it will open a terminal with that folder already mounted. This saves you the trouble of manually changing the directory.
  7. Now you are ready to enter the command string needed to run the SYSCON script. You can do that using the following formula. "python ps3_syscon_uart_script.py [COM port of your adapter] [CXR or SW]. Note if your console is an A - K model (COK-001/2/2W, SEM-001, or DIA-001/2) then you must use the CXR command. For example, this is the command I use for my A model PS3:
    Code:
    python ps3_syscon_uart_script.py COM4 CXR
    If everything worked you will see >$ greet you!View attachment 41325
  8. Now type in AUTH or auth. It is case sensitive, so if one doesn't work try the other. If you get Auth1 response invalid, after trying it both ways, then you got the RX and TX wires reversed. Turn off the console and switch the wires around. It's important you close the terminal and reset the console back to standby. Repeat step 1-5. This time it should say Auth Successful.
  9. Now you can use External commands. The one you're most interested in is ERRLOG, which returns the last 32 codes stored. Luckily you don't have to retrieve them 1 at a time. You can copy the code below and press CTRL+V to paste them into the CMD terminal! It will automatically run all of them at one after the other. ERRLOG GET 00 returns the most recent error code. ERRLOG GET 01, returns the second most recent, and so on. This is Hexadecimal format, so after 09, the tenth error code is 0A!:
    Code:
    ERRLOG GET 00
    ERRLOG GET 01
    ERRLOG GET 02
    ERRLOG GET 03
    ERRLOG GET 04
    ERRLOG GET 05
    ERRLOG GET 06
    ERRLOG GET 07
    ERRLOG GET 08
    ERRLOG GET 09
    ERRLOG GET 0A
    ERRLOG GET 0B
    ERRLOG GET 0C
    ERRLOG GET 0D
    ERRLOG GET 0E
    ERRLOG GET 0F
    ERRLOG GET 10
    ERRLOG GET 11
    ERRLOG GET 12
    ERRLOG GET 13
    ERRLOG GET 14
    ERRLOG GET 15
    ERRLOG GET 16
    ERRLOG GET 17
    ERRLOG GET 18
    ERRLOG GET 19
    ERRLOG GET 1A
    ERRLOG GET 1B
    ERRLOG GET 1C
    ERRLOG GET 1D
    ERRLOG GET 1E
    ERRLOG GET 1F
  10. Hold SHIFT+UP to highlight the text in the CMD terminal. Then press CTRL+C to copy it. Open notepad and paste the code there. Then save it so you have a record of the console's errorlog.
    • Note: The errorlog only holds 32 errors. So if you do a bunch of testing, each new error will force the oldest error off the end of the log. This errorlog is a record of the console's history and can be useful to piece together a story about what happened. So it's best not to test the console a bunch of times. Instead retrieve the errorlog first thing after experiencing a YLOD, to avoid loosing important clues.
    • Don't take a picture of your errorlog. It takes about 10 posts or so before you can directly attach it to the forum. So you'll have to upload it to Imagur before you can insert it using the "image" button in the toolbar. It's easier to use the "insert" --> "code" option instead! Just copy your errorlog from the TXT file you created in notepad. Side note: You can also find the spoiler quote in the insert button as well. That's sometimes useful to keep long posts manageable. I used them a bunch in this post, for example.

    The error codes are followed by a timestamp. However, timestamps are in a wierd format when retrieved using EXTERNAL access mode (CXR), so you don't know when the errors occured! You can tell if they occured at the same time if the characters match, tho. That can be helpful. Timestamps a big piece to the console's history. If you gain INTERNAL access (CXRF), they will show the date/time each error occurred. So that's one good reason to continue on.
Internal Access Mode - Unlocks more commands and controls
Okay, internal mode is pretty easy. However it's only for A - K models (COK-001/2/2W, SEM-001, DIA-001/DIA-002).

  1. AUTH in external CXR mode as normal.
  2. EEP GET 3961 01 --> should return "00000000 FF"
  3. EEP SET 3961 01 00 (changes the bit to allow internal access mode).
    • be very careful that you are only changing address 3961. Double check that you didn't accidentally type in the wrong numbers! This will have to be fixed if you do, but you will need to know what it was before we can set it back!
  4. EEP GET 3961 01 (verify the change) --> Should now return "00000000 00".
  5. Shut off console & close the CMD prompt/terminal. Connect the Diag wire to GND and turn console back on. It will beep 3 times and start flashing because the checksum doesn't match anymore. This is normal! We're going to fix that next...
  6. You need to use internal command CXRF now. Here's an example of the commands I have to use every time I gain access for a test, but you'll have to change the "COM4" to whichever comm port your usb to serial device was assigned. You can find it under usb devices in the device manager.:
    Code:
    CD C:\Users\HTPC\Desktop\PS3\SYSCON
    python ps3_syscon_uart_script.py COM4 CXRF
  7. AUTH (Uppercase). It should say "AUTH successful." If so, you're in!
  8. eepcsum --> will return addresses that "should be" somthing like "0x0038". The address you need to change is the line after the "sum:0x0100" line. The sum indicates the mismatch. Ignore the line before of after, the address you want to change is the one immediately following the sum line. So for example if the that line reads "Addr:0x000039fe should be 0x0038" then you do the following...
  9. w 39fe 38 00 (don't just copy this command. yours could be different! Just put it in like this example, based on your actual checksum mismatch. For example, if your address should be "0xff38" then your command should be "w 39fe 38 ff". Hit enter...
    • --> should just go to the next line or say write successful, I don't remember (you only have to do this once per console. Notice that the 00 and 38 are swapped? That is endian byte swapping. Be sure you enter this in correctly, or you'll have to do another write to fix it. But you can get it wrong and fix it. Just don't shut off the console until it's correct!
  10. r 39fe 02 (validate the change) --> If you did it right the byte swapped number you changed will show 38 00 below the dashed line. Alternatively, you can type in the command eepcsum again. If the checksums match now, then the "sum:0x0100" line will not be there anymore and the console will start normally now. Everything is as it should be. Please note that this process only changes one byte. If you have 2 checksum mismatches, that means you accidentally changed something else during step 3. That's why you need to be very careful that you are only changing address 3961.
  11. Here is an example of me doing the above process on a COK-002...
    Code:
    Microsoft Windows [Version 10.0.19042.1165]
    (c) Microsoft Corporation. All rights reserved.
    
    C:\Users\HTPC\Desktop\PS3\SYSCON>python ps3_syscon_uart_script.py COM4 CXRF
    >$ AUTH
    Auth successful
    >$ eepcsum
    eepcsum
    Addr:0x000032fe should be 0x528c
    Addr:0x000034fe should be 0x7115
    sum:0x0100
    Addr:0x000039fe should be 0x0038
    Addr:0x00003dfe should be 0x00ff
    Addr:0x00003ffe should be 0x00ff
    >$ w 39fe 38 00
    w 39fe 38 00
    w complete!
    [mullion]$
    >$ r 39fe 02
    r 39fe 02
    +0 +1 +2 +3 +4 +5 +6 +7 +8 +9 +A +B +C +D +E +F
    -----------------------------------------------
    38 00
    >$ eepcsum
    eepcsum
    Addr:0x000032fe should be 0x528c
    Addr:0x000034fe should be 0x7115
    Addr:0x000039fe should be 0x0038
    Addr:0x00003dfe should be 0x00ff
    Addr:0x00003ffe should be 0x00ff
  12. Turn off the console and turn it on again. The standby led will be solid red and stop flashing. That's because the checksum matches and you successfully gained internal access.

From now on you will connect RX, TX, and DIAG. Then use CXRF mode to AUTH in (Uppercase). Example code):
Code:
Microsoft Windows [Version 10.0.19044.1466]
(c) Microsoft Corporation. All rights reserved.

C:\Users\HTPC>CD C:\Users\HTPC\Desktop\PS3\SYSCON

C:\Users\HTPC\Desktop\PS3\SYSCON>python ps3_syscon_uart_script.py COM5 CXRF
>$ AUTH
Auth successful
>$
Just be sure to check the COM port your serial adapter was assigned in windows. The last time I used mine it was COM4, but today it was COM5. Annoying, but if you're having trouble double check that. Also you want to "AUTH" in (uppercase). You can actually "auth" in (lowercase), but it'll only let you retrieve the errlog. If you try to use the other commands it'll say "unknown command." So be sure to "AUTH" in

Here are the internal commands I recommend using...

bringup starts the console and displays a log of the power sequence. That's very useful for diagnosing. It allows you to see "when" an error occurred during the power sequence and can sometimes give you clues about the error, such as the BitTraining error in the following example from an A0403034 (BGA/Bump defect)...
Code:
>$ bringup
bringup
[SSM] state: 0000 -> 0101
Bringup Mode #0 (0xFF)
[SSM] ssmCb_OnStartingBePowOn() called.
[SSM] First Boot.
[SSM] Bringup mode : syspm_stat=00000000/00000000
[POWSEQ] PowerSeq_Setup called.
[SSM] state: 0101 -> 0201
[POWSEQ] AV Backend Setup
[SSM] state: 0201 -> 0102
[SSM] state: 0102 -> 0202
[SSM] state: 0202 -> 0103
[SSM] state: 0103 -> 0203
[SSM] ssmCb_BeforeBeOn() called.
[SSM] state: 0203 -> 0104
Psbd_SbTransMode_Half:0x20e2
>$
[POWERSEQ] Error : BitTraining RSX:RRAC:RX0:GLOBAL1:RX_STATUS
[SSM] state: 0104 -> 0304
[SSM] ssmCb_AfterBeOn2() called.
[SSM] PowSeq Fail : Detected !
[SSM] state: 0304 -> 0700
[POWSEQ] AV Backend Letup
[SSM] Shutdown mode : syspm_stat=00000000/00000000
[ERROR]: 0xa0403034
[POWSEQ] PowerSeq_Letup called.
[SSM] state: 0700 -> 0600
(PowerOff State) (Fatal)

[mullion]$
>$
Another useful internal only command is becount. It displays the consoles usage history:
Code:
>$ becount
becount
Bringup : 1651 times
Shutdown: 760 times
Power-on: 80day 21hour 09min 20sec

It would help out the community alot if you post the becount and bringup with your errlog.

All PS3's from L models onward (VER-001...)
Note: Beginning with L models (VER-001) SONY began using a different SYSCON Firmware called "Sherwood" (SW for short). These models do not have internal/external modes. You do not need a DIAG wire and you don't have to mess around with EEPROM to enable internal access mode, since it's enabled by default!
  1. Connect RX & TX wires. Sherwood SYSCON's DO NOT NEED A DIAG WIRE.
  2. Connect GND on your USB UART adapter to a GND on the PS3
    • We are just grounding the USB adapter to the console. The RF shield is the most convenient place to ground the USB adapter to. Or the copper ring around the perimeter of the motherboard will work. Alligator clips work great. You do not need to solder a connection! This is just to be sure the computer and PS3 are sharing the same GND reference. It's not strictly necessary, but good practice.
  3. Be sure that the PSU is plugged in. To both the 5v and 12v connectors. Technically, the 2 prong 12v connector is not needed to power and access the SYSCON, but you will get an error without the 12v connector if you attempt to power on. Just be aware of that.
  4. Plug in the PS3 so that the standby LED illuminates.
  5. Open the folder containing the SYSCON python script you downloaded earlier. At the top of the window there is a filepath box. Click on the file path and it'll highlight. If you type CMD into this bar, it will open a terminal with that folder already mounted. This saves you the trouble of manually changing the directory.
  6. Now you are ready to enter the command string needed to run the SYSCON script. You can do that using the following formula. "python ps3_syscon_uart_script.py [COM port of your adapter] [SW]. For example...
    Code:
    python ps3_syscon_uart_script.py COM4 SW
    If everything worked you will see >$ greet you!View attachment 41325
  7. Now type in AUTH or auth. It has been reported that "AUTH" in uppercase enables external commands and "auth" in lower case enables internal commands. I have not tried this myself, since I mainly work on Mullion SYSCON's. So try it out if the commands you want to use aren't working.
    • If you get Auth1 response invalid, after trying it both ways, then you got the RX and TX wires reversed. Turn off the console and switch the wires around. It's important you close the terminal and reset the console back to standby. Repeat step 1-5. This time it should say Auth Successful.
  8. If you AUTH in uppercase, you can use External commands. The one you're most interested in is ERRLOG, which returns the error codes. Luckily you don't have to retrieve them 1 at a time. You can copy the code below and press CTRL+V to paste them into the CMD terminal! It will automatically run all of them at one after the other. ERRLOG GET 00 returns the most recent error code. ERRLOG GET 01, returns the second most recent, and so on. This is Hexadecimal format, so after 09, the tenth error code is 0A!:
    Code:
    ERRLOG GET 00
    ERRLOG GET 01
    ERRLOG GET 02
    ERRLOG GET 03
    ERRLOG GET 04
    ERRLOG GET 05
    ERRLOG GET 06
    ERRLOG GET 07
    ERRLOG GET 08
    ERRLOG GET 09
    ERRLOG GET 0A
    ERRLOG GET 0B
    ERRLOG GET 0C
    ERRLOG GET 0D
    ERRLOG GET 0E
    ERRLOG GET 0F
    ERRLOG GET 10
    ERRLOG GET 11
    ERRLOG GET 12
    ERRLOG GET 13
    ERRLOG GET 14
    ERRLOG GET 15
    ERRLOG GET 16
    ERRLOG GET 17
    ERRLOG GET 18
    ERRLOG GET 19
    ERRLOG GET 1A
    ERRLOG GET 1B
    ERRLOG GET 1C
    ERRLOG GET 1D
    ERRLOG GET 1E
    ERRLOG GET 1F
  9. Hold SHIFT+UP to highlight the text in the CMD terminal. Then press CTRL+C to copy it. Open notepad and paste the code there. Then save it so you have a record of the console's errorlog.
    • Note: The errorlog only holds 32 errors. So if you do a bunch of testing, each new error will force the oldest error off the end of the log. This errorlog is a record of the console's history and can be useful to piece together a story about what happened. So it's best not to test the console a bunch of times. Instead retrieve the errorlog first thing after experiencing a YLOD, to avoid loosing important clues.
    • Don't take a picture of your errorlog. It takes about 10 posts or so before you can directly attach it to the forum. So you'll have to upload it to Imagur before you can insert it using the "image" button in the toolbar. It's easier to use the "insert" --> "code" option instead! Just copy your errorlog from the TXT file you created in notepad. Side note: You can also find the spoiler quote in the insert button as well. That's sometimes useful to keep long posts manageable. I used them a bunch in this post, for example.
  10. If you auth in lowercase, you can use most of the internal commands. The most useful is errlog. This will retrieve all 32 error codes with their timestamps. This is more useful to figure out the sequence of events! I suggest you always auth in. It's more useful.

SYSCON Commands:
Now you can now use internal commands like "lasterrlog," "bringup," "powerstate," "errlog," and more. You can also adjust fan curves without custom firmware!

becount shows a total count of startups, shutdowns, and PWR on time. That can give you an idea of how the console was used and how much wear and tear it has. Maybe it'll help you decide if the console is worth repairing. For example, a console with less usage time might be worth saving, because it's likely to last a long time. Also error codes 40 3034 are known to be associated with RSX issues only a reflow/reball might fix. That's a time consuming and difficult procedure only experienced technicians should attempt. Many repair shops consider these consoles not worth repairing. So this error code can save them alot of time and expense diagnosing the problem.

bringup will start the console and show a log of the power on sequence. If there is an error it can provide useful information about when/where the error occurred. You should be sure that the power supply is fully connected to avoid errors about the 12v not being connected.

powerstate lists the major power systems and whether they are on or off, or available. Run this after bringup, so that the console is on. Otherwise, of course they would be off.

errlog will list all 32 errors in the log with their timestamps. I suggest you run this after the above 3 commands in the order presented. Then copy the CMD lines into notepad. Post that on the forum using the Insert --> code button in the top toolbar of the reply box. That'll be helpful for us to help you. Also, please give us a complete history of your console. Was it sealed when you got it? What work have you don on it since? Did you notice any damage? Maybe post a picture of the Motherboard front and back. Please don't be ashamed to admit you accidentally damaged something. It happens! We just don't want to spin our wheels guessing at what's wrong when you scratched a trace deliding the CPU, or shorted a wire attempting a NEC/TOKIN replacement. Whatever work has been done on the console is relevant! The error codes are just part of the story.

tmp get 0 and tmp get 1 are useful. Temperature zone 0 is the CPU and 1 is the RSX. So by typing those in while the console is running you can record temperatures in real time without soft moding! Also, duty get 0 will show the current fan percentage!

With internal access mode you can even adjust the fan curves! You can dial them in to be more aggressive and keep the console cooler. Or you can lower the thermal shutdown temperature so the console will overheat at a lower temperature, thus improving reliability. Check out, "Syscon fan settings (Coordinate Graphs)" if you'd like to learn more.

For Example, here's the default COK-001/2 fan curve. The following code could be copied and pasted into the CMD terminal to write these to the fan table. Upon reboot they will become permanant. So you can change these to tighten the curve as you like. And you can use this default code to revert it back.
Code:
fantbl setini 0 p0 00.00 74.00 0x33
fantbl setini 0 p1 60.00 75.00 0x40
fantbl setini 0 p2 61.00 76.00 0x48
fantbl setini 0 p3 67.00 77.00 0x4d
fantbl setini 0 p4 68.00 78.00 0x5a
fantbl setini 0 p5 71.00 79.00 0x66
fantbl setini 0 p6 71.50 80.00 0x73
fantbl setini 0 p7 72.00 81.00 0x80
fantbl setini 0 p8 72.50 82.00 0x99
fantbl setini 0 p9 73.00 85.00 0xff
tshutdown setini 0 85
fantbl setini 1 p0 00.00 83.00 0x33
fantbl setini 1 p1 48.00 84.00 0x40
fantbl setini 1 p2 71.00 85.00 0x48
fantbl setini 1 p3 77.00 86.00 0x4d
fantbl setini 1 p4 78.00 87.00 0x5a
fantbl setini 1 p5 80.00 88.00 0x66
fantbl setini 1 p6 80.50 89.00 0x73
fantbl setini 1 p7 81.00 90.00 0x80
fantbl setini 1 p8 81.50 91.00 0x99
fantbl setini 1 p9 82.00 95.00 0xff
tshutdown setini 1 95
r 34fe 2
eepcsum
w 34fe 15 71

Asking for help:

Other UART Diagnostics:
Example test pad locations on a COK-001.
uart_all-cok-00x-jpg.41310

Other mother board locations will vary. Obviously the EEGS is only on COK-001 MB revisions.
  1. Follow SYSCON UART Tutorial as normal.
  2. Choose the correct command to enable SB UART, depending on your SYSCON version.
    • Mullion SYSCON = w 7202 02
    • Sherwood SYSCON = w 4202 02
  3. Use putty to UART over serial @ 115200 Baud rate.
  4. Turn the console on and the SB log should just start pouring out. Except when…
    • the console doesn't get far enough into the bootloader for the Southbridge to initialize. For example, if you have a Green Light of Death (GLOD) use the bringup command in SYSCON UART to start the console and check the log. The console should get past the power on sequence and start the bootloader. But in some cases, an "XDR Not initialized" failure can cause a GLOD that does not get far enough for the Southbridge to start. That error can indicate a dead XDR Ram module or broken CPU traces leading to one of them. This is one situation where the SB will not output a log.
(Optional)
Thanks to @M4j0r on the PSX place for the following:

'The "SB log enable" already enables all "Hypervisor" messages, but to enable hypervisor service PME or SS logs and output them to the SB UART device, the following commands enable them. Basically displays more information that may be useful in certain circumstances. Note that you will need to disable them after you're done otherwise you may not be able to boot.'

To Enable PME & SS Logs:

Mullion SYSCON:
Code:
w 72CF 03
w 72F0 03
w 72F1 03
Sherwood SYSCON:
Code:
w 42CF 03
w 42F0 03
w 72F1 03
'After that, boot the system and attempt the Southbridge UART installation again. The SB UART log will now be longer and include some information from various Hypervisor services. The PS3 will be slower because of all the log outputs.'​

To disable PME & SS Logs:

Mullion SYSCON:
Code:
w 72CF FF
w 72F0 FF
w 72F1 FF
Sherwood SYSCON:
Code:
w 42CF FF
w 42F0 FF
w 42F1 FF
Why I am not able to see SB log on JSD-001 model?

I wrote the commands in Syscon and use Tx and Rx SB points on Putty serial connection setting baud rate 115200.
 
Try in syscon r 1202 01 and if you see 05 try w 1202 02 then if you test r 1202 01 should show 02 on that place.

How can I do the ps3 to work on factory service mode without dongle?
I patched the nor with 3.55 fsm and rvk but I am not able to activate the fsm with dongle. Can I change the Syscon value to be able to update with lv2diag?
 
Have you tried to put 3.55 pup cfw./ofw on usb stick on root of a stick and lv2. self diag file for fsm just beside that pup. It should install if you power plus eject quick. Can't remember if nands work for sure without dongle. Maybe won't work if you probably tried for nor.
Anyway w 1202 05 is factory default. Don't worry won't affect nothing.
 
1201 is RSX overheat error. Step number 20/21 is at the intialization stage when CPU and GPU are first powered. So it could be a bad thermal monitor or internal diode. Start by delidding and replacing TIM. Then Thermal IC.

The caps are fine.
Okay, I've replaced the caps just to be sure, no dice of course. Where is the thermal ic on a SUR-001? And is there a way to test it?
Just so you know, I am concerned about delidding the RSX. Because as you said, "heat is a wildcard". Not quite some enticing words as an amateur. And I got a fact just so happen to hate wildcards...
 
Okay, I've replaced the caps just to be sure, no dice of course. Where is the thermal ic on a SUR-001?
Same place it is on COK-001.
Thermal Monitors (SUR-001).png
And is there a way to test it?
Well, yes there are lots of ways to test it. But the easiest is to simply delid the RSX and see if the issue goes away. If not replace the thermal monitor. You could probe the TC external diode resistor pair and confirm the resistance is the same. And that the capacitor between them isn't short. But I seriously doubt that's the issue.

Just so you know, I am concerned about delidding the RSX. Because as you said, "heat is a wildcard". Not quite some enticing words as an amateur. And I got a fact just so happen to hate wildcards...
Don't be. It's pretty easy to delid. So long as you are careful not to mar the interposer and go in from the side that doesn't have SMDs.
 
Try in syscon r 1202 01 and if you see 05 try w 1202 02 then if you test r 1202 01 should show 02 on that place.
Where did you find that?

I am trying to understand how to determine which SYSCON versions have which command to enable SB UART. I thought it was a mullion vs sherwood thing. But apparently some require changes to address 1200? Is that a thing based on specific SYSCON revision or what? I should add it to the Tutorial, but need to know how to know what consoles will need it.
 
See: https://www.psdevwiki.com/ps3/SC_EE..._and_Block_Offset_Mapping_Table_(NVS_Service)
"SC EEPROM Offset" vs Physical Offset (CXR713) vs Physical Offset (CXR714) vs Virtual Offset (SW)
So does the virtual offset 0x1200 command bypass the physical offset? because CXR713 and CXR714(Mullion and Sherwood) have two different physical offsets (0x7200 and 0x4200) but the same virtual offset. Can we get the extra SB log information simply by using the virtual offset command on both versions of syscon?
 
So does the virtual offset 0x1200 command bypass the physical offset? because CXR713 and CXR714(Mullion and Sherwood) have two different physical offsets (0x7200 and 0x4200) but the same virtual offset. Can we get the extra SB log information simply by using the virtual offset command on both versions of syscon?
No you have to use the base address listed in the table. The Mullion (CXR713 + CXR714) don't have a virtual offset, only Sherwood (SW) does have it.
The PS3 bootloader (lv0(ldr)) and hypvervisor (lv1) see the "SC EEPROM offset".
That's e.g. 0x48C02 for the network device mode, the flag which enables the south bridge log output.
0x48C02 translates to 0x7202 for CXR713, 0x4202 for CXR714 and 0x1202 for SW.
Although the table isn't 100% correct because the CXR713120-203GB uses the CXR714 offsets.
 
Same place it is on COK-001.
View attachment 41606

Well, yes there are lots of ways to test it. But the easiest is to simply delid the RSX and see if the issue goes away. If not replace the thermal monitor. You could probe the TC external diode resistor pair and confirm the resistance is the same. And that the capacitor between them isn't short. But I seriously doubt that's the issue.

Don't be. It's pretty easy to delid. So long as you are careful not to mar the interposer and go in from the side that doesn't have SMDs.
Delidded, paste is bone dry. do I just replace with standard thermal paste?
 
Up to you. I've used MX4 with long lasting results. just don't use thermal grizzly kryonaught, it's not meant for hight temp use. It's designed for freezing temps, hence the name.
 
Back
Top